Last weekend I started to learn RxJS. It’s a pretty cool library, so be sure to have a look on it.
I also created some smaller examples and I’m planning to write some explaining to them later.
If you are interested, you can check them out. Right now there are only three examples, but I’ll add more.
As the title tells you, we finally started our side project called MetoCat (nothing special in the name, we were just out of our creative
pills sorry… ).
So, what is this side project? Basically it’s the abstraction of the Batman vs Superman (BVS) application I created a few months ago.
We wanted to build something simple, that can be scaled easily later, so the BVS app was the best starting point to do that.
Just another voting app, really?
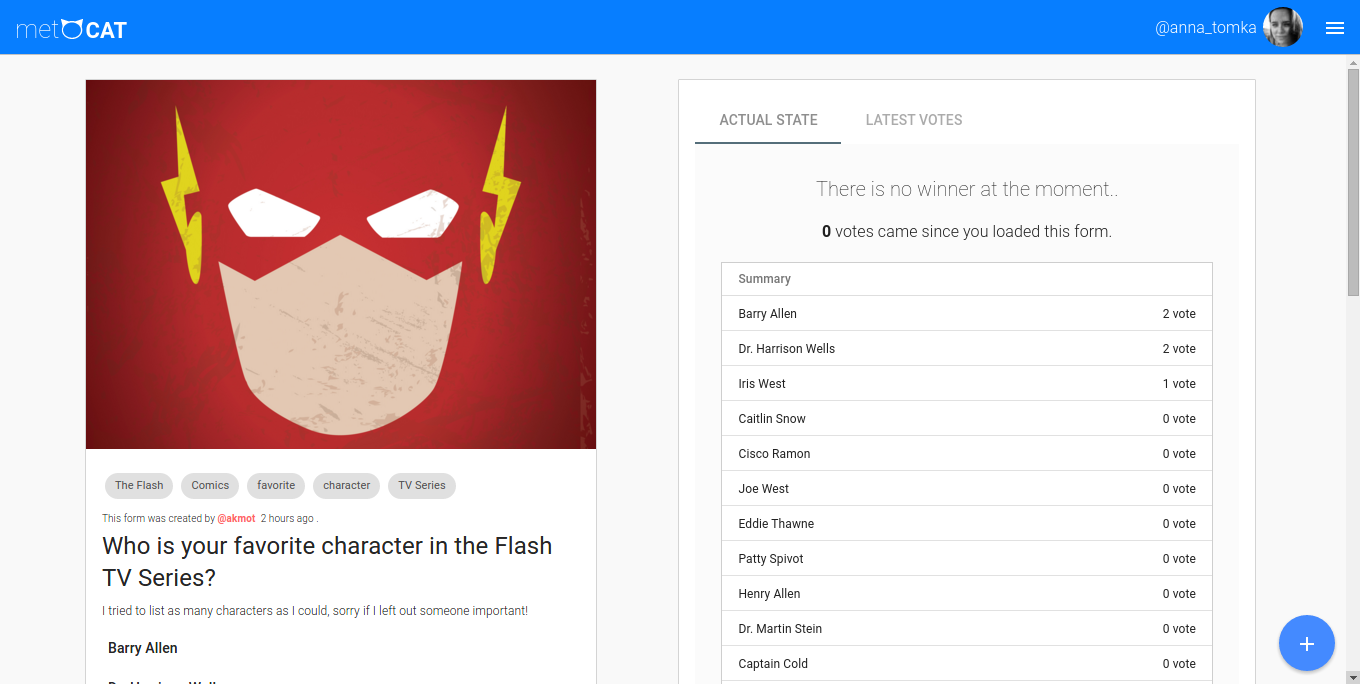
In MetoCat you can create similar voting forms, it’s a dynamic version of BVS, but we are planning to build much more features because it’s really awesome to work on your idea in your free time, especially with AngularJS (even if your idea is a small thing). Yeah, MetoCat is built in AngularJS (1.4).
What features?
So what feaures does MetoCat have right now? It’s not a world-saving application (yet), so don’t wait for that cool stuffs… but you can do the following things in it:
Login with Twitter or Reddit (wait for so much more to come…)
Create voting forms (You can upload image to it, select multiple opponents, tags, you can create it as anonim)
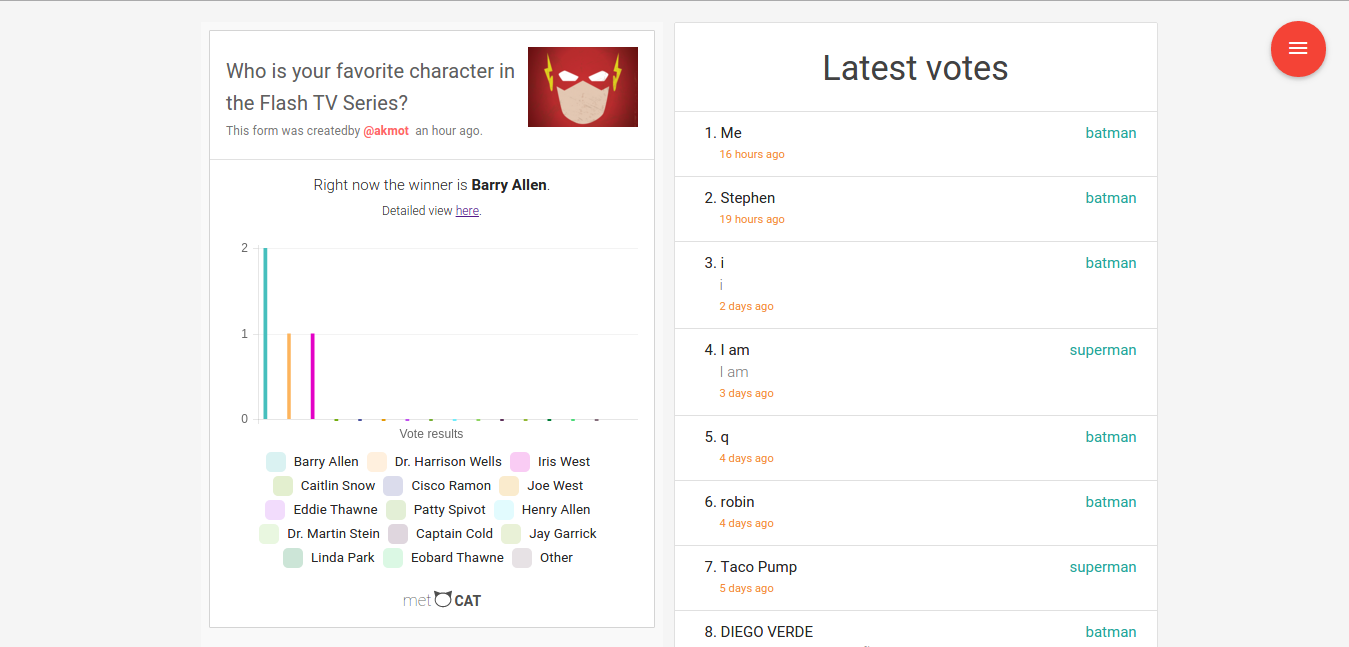
Vote forms (even as anonim), see results (simple realtime statistics)
Embed any form in your website
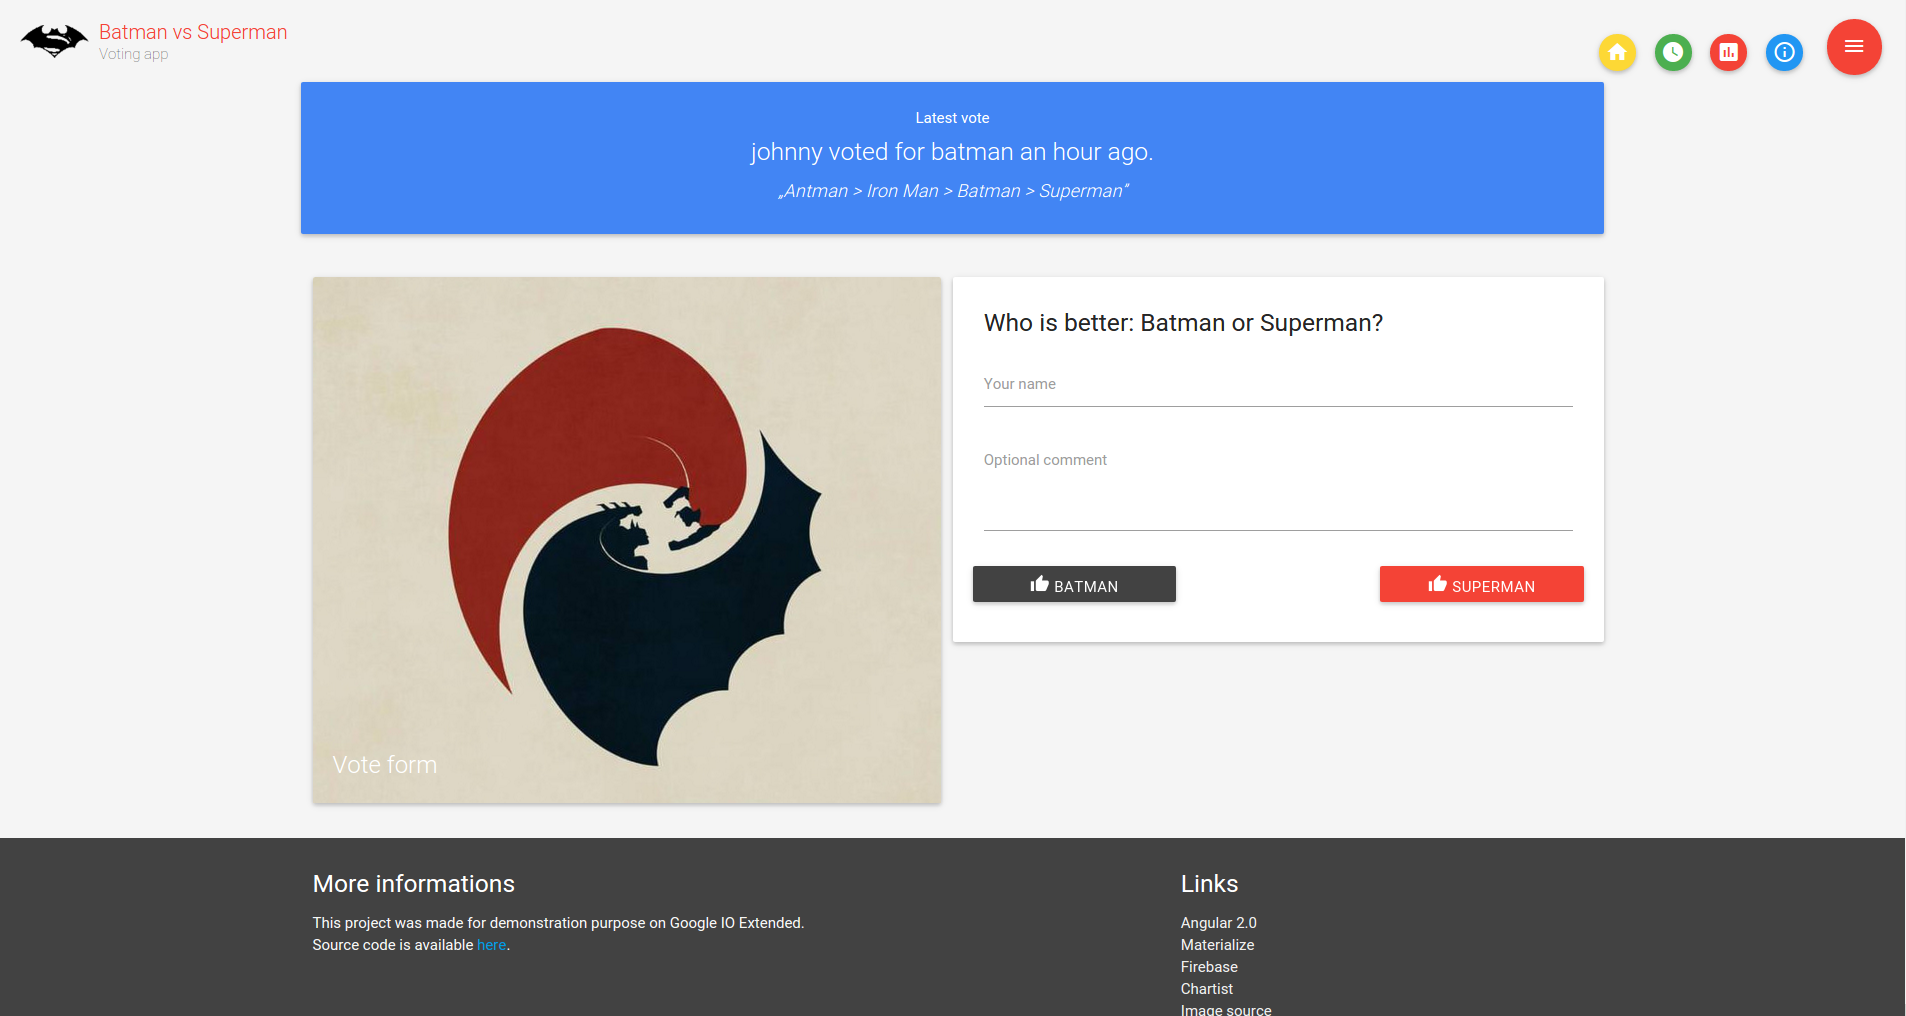
How embed looks like, you can checkout the BVS app:
I hope you like the initiative. There will be more updates and features, just wait for it!
There was a previous post about my demo site Batman vs Superman. It’s a simple voting application, what I created for a Google IO Extended
demonstration.
It was made with AngularJS 2 back in March, but the API changed a lot (really lot) since then so I started to update my demo too. Meanwhile I’ve got some ideas too to improve the main features a little bit. I’m planning to create a step-by-step tutorial
that will describe how to build this application on your own.
I also have other project ideas which are currently under development. I will post about them as soon as they reach a beta version.
Until then checkout the actual state of the Batman vs Superman site:
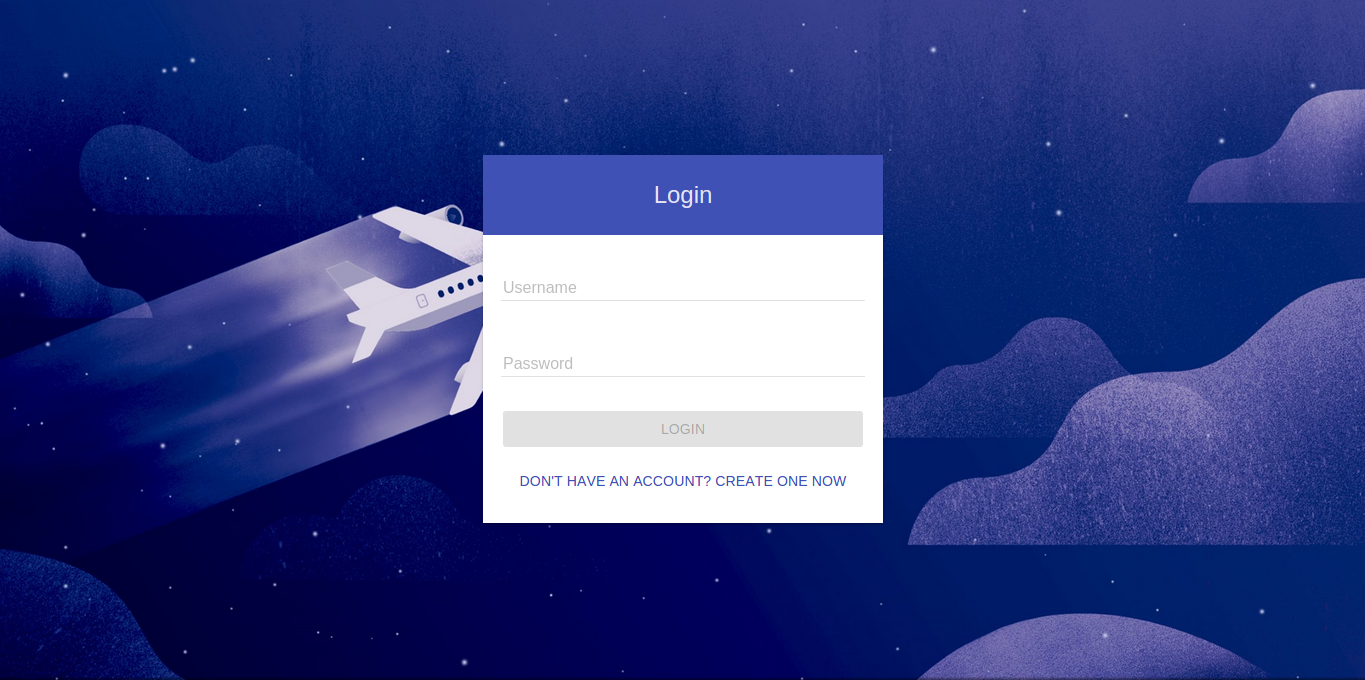
We have a login form as a starting form, but unfortunately there’s no user we could log in to the chat. For this purpose let’s create the registration form in this section. Extend index.routes.js with the following route:
As you can see from the code above we need a template and a controller too… Create folder registration and place registration.controller.js here with the following content:
(function(){'use strict';angular.module('angularChat').controller('RegistrationController',RegistrationController);/** @ngInject */functionRegistrationController($rootScope,$scope,UserService,User,AccountService,$state){varregistrationCtrl=this;registrationCtrl.user=newUser();registrationCtrl.register=function(){UserService.create(registrationCtrl.user).then(function(user){$rootScope.toast("Registration successful! You are now logged in :)");AccountService.login(user.username,user.password).then(function(){$state.go("rooms",{},{reload:true});});},function(error){});}}})();
We need to link somehow the registration form with the login form, so add a registration button to login.html as the following example shows:
<aclass="md-primary md-button md-cyan-theme"ui-sref="registration"aria-label="Don't have an account? Create one now">Don't have an account? Create one now</a>
Profile
step_profile
Complete the profile.directive.js directive to load the current user:
The room creator button directive is in the create.room.fab.directive.js, but the event handler method is missing. Let’s implement this function:
createRoomCtrl.create=function(){RoomService.createRoom(createRoomCtrl.newRoom).then(function(result){$rootScope.toast("Room "+result._id+" created successfully!");$mdDialog.hide();},function(result){console.error(result);$rootScope.toast("We couldn't create your room, sorry :(")});}
We need to call this method in the create.room.fab.tmpl.html template:
In this section we will create a panel that lists all available rooms. This panel will be activated from a button in the top menu. Let’s see how to implement all of this!
This is a plain old Angular Material button with a little bit of directive (room-list-opener) on top of it. Wait, we haven’t written this directive yet, so do it now (room/room.list.directive.js):
Here we can see the previously defined RoomListController listed as controller but it doesn’t do anything special yet. We want to display all rooms, so we need to query them from the RoomService
roomListCtrl.rooms=RoomService.getRooms();
The template is missing though, so add a room.list.tmpl.html file with the following content:
<md-bottom-sheetclass="md-list md-has-header"><md-subheader>Available Rooms
<small>Click the room you want to open</small></md-subheader><md-contentstyle="max-height: 200px;"><md-chipsng-model="roomListCtrl.rooms"readonly="true"><md-chip-template><strongng-click="roomListCtrl.openRoom($index,$chip)"></strong></md-chip-template></md-chips></md-content></md-bottom-sheet>
Open room
In this section we will create a tab layout for the opened rooms.
First things first, add a getRoom function to the room.service.js file:
When you click a room in the list, it would be awesome to actually open the selected room. That means a new navigation aka state in the index.route.js file:
As you can see we also need a RoomItemController for this state, so create room.item.controller.js file in the room directory with the following content:
Next create the basic room view in room.item.html file:
<divlayout="row"layout-wrap><md-contentlayout="column"flex="80"flex-sm="100"><md-contentstyle="height: 60vh;"></md-content><md-contentlayout-paddinglayout="column"></md-content></md-content><md-contentclass="side-nav room-users"hide-smlayout="column"flex="18"><md-listlayout-fill><md-subheaderclass="md-accent">Available users</md-subheader><md-list-itemclass="md-2-line contact-item selected"ng-repeat="(index, contact) in roomItemCtrl.users track by contact._id"ng-show="contact.username"><avataruser="contact"></avatar><divclass="md-list-item-text compact"><h3></h3><p>@</p></div><md-divider></md-divider></md-list-item></md-list></md-content></div>
Declare the openedRoomsFactory dependency in room.list.directive.js file, and implement the function responsible for opening a room:
roomListCtrl.openRoom=function(index,room){if(!openedRoomsFactory.containsRoom(room)){openedRoomsFactory.addRoom(room);$state.go("rooms.room",{id:room._id},{reload:false});}else{$rootScope.toast("You've already opened this room!");}};
Add an event handler to room.list.tmpl.html:
ng-click="roomListCtrl.openRoom($index,$chip)"
For our tab layout we need to create the RoomsController too (room.tabs.controller.js):
Next create the view for the tab layout (room.tabs.tmpl.html) with the following code:
<md-contentflexng-if="roomsCtrl.rooms.length > 0"><md-subheader>Opened Rooms right now</md-subheader><md-tabsmd-dynamic-heightmd-selected="roomsCtrl.selectedIndex"md-border-bottom><md-tabng-repeat="room in roomsCtrl.rooms"><md-tab-label><ang-click="roomsCtrl.removeRoom($index,room)"><md-iconmd-svg-icon="navigation:close"></md-icon></a></md-tab-label><md-tab-body><divng-if="roomsCtrl.selectedIndex === $index"ui-viewflex></div></md-tab-body></md-tabs></md-content>
Don’t forget about unsubscribing the user when leaving the room! To achieve this, add the following changes to the logout method of the account.service.js file (add socketFactory and openedRoomsFactory dependencies too):
varopenedRooms=openedRoomsFactory.getRooms();//logout from rooms_.forEach(openedRooms,function(room){socketFactory.emit("unsubscribe",{room:room._id,user:getLoggedInUser()});});
Add openedRoomsFactory dependency to create.room.fab.directive.js and following changes too (here you make sure when opening a new room it will be listed in the opened rooms and actually opened too):