
AngularJS Chat
23 Sep 2015This is an example that shows how to create a simple Chat application with the following technologies: AngularJS, Angular Material, Socket IO.
The full example is available on branch master, but you can start from nearly scratch when you checkout branch step_registration.
Demo
Demo is available here: https://angularchatexample.firebaseapp.com
Main features:
- Login
- Registration
- Logout
- View/Update Profile
- Create room
- List rooms
- Open room
- List users in a room
- List messages in a room
- Create new message
Source
Git
If you use Git, you can clone the repository of the application with the following command:
git clone https://github.com/annatomka/angular-chat.gitDownload as zip
If you don’t want / can’t use Git, you can download the source from the following url:
https://github.com/annatomka/angular-chat/archive/step_registration.zipRegistration
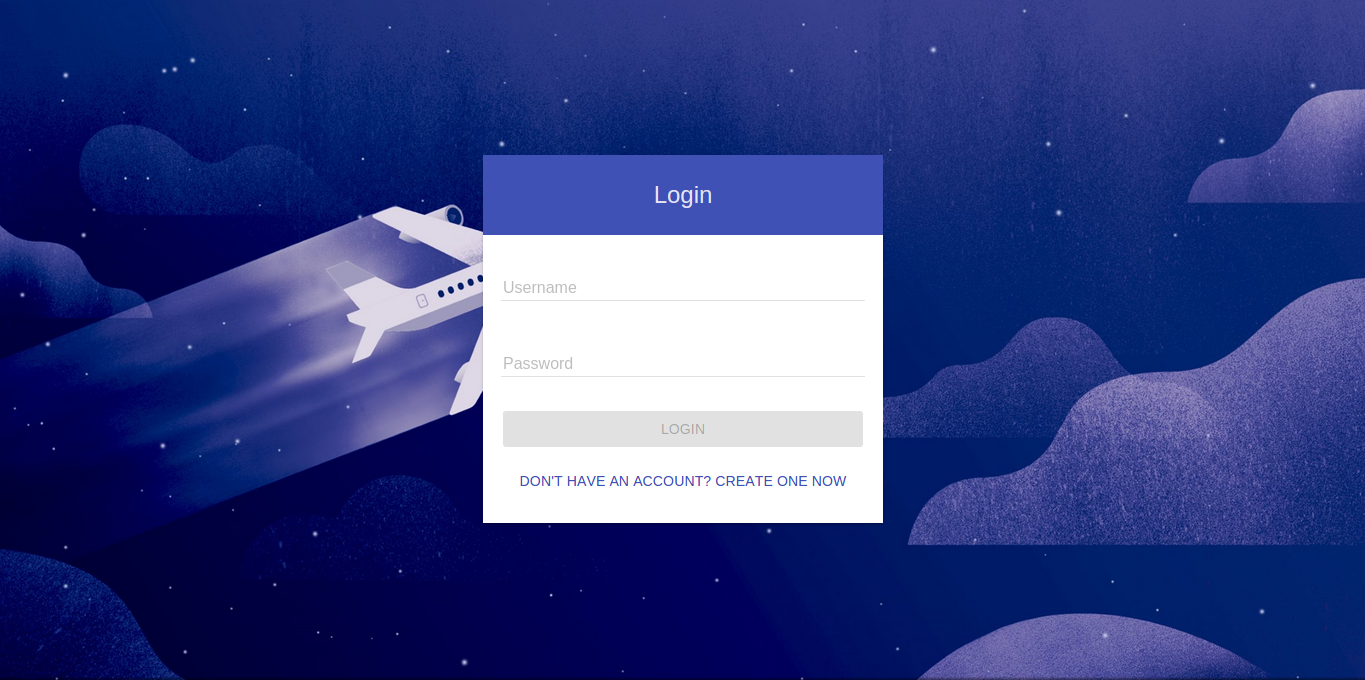
We have a login form as a starting form, but unfortunately there’s no user we could log in to the chat. For this purpose let’s create the registration form in this section. Extend index.routes.js with the following route:
.state('registration', {
url: '/registration',
templateUrl: 'app/registration/registration.html',
controller: 'RegistrationController',
controllerAs: 'registrationCtrl'
})
As you can see from the code above we need a template and a controller too… Create folder registration and place registration.controller.js here with the following content:
(function () {
'use strict';

angular
  .module('angularChat')
  .controller('RegistrationController', RegistrationController);

/** @ngInject */
function RegistrationController($rootScope, $scope, UserService, User, AccountService, $state) {
  var registrationCtrl = this;
  registrationCtrl.user = new User();

  registrationCtrl.register = function () {
    UserService.create(registrationCtrl.user).then(function (user) {
      $rootScope.toast("Registration successful! You are now logged in :)");
      AccountService.login(user.username, user.password).then(function(){
        $state.go("rooms",{},{reload: true});
      });
    }, function (error) {

    });
  }
}
})();
Add registration.html with the following HTML:
<div class="registration-frame" ui-view="" flex="" layout="row">
<div layout="row" flex="" layout-padding="" layout-fill="" layout-align="center center" class="ng-scope">
  <div flex="40" flex-lg="50" flex-md="70" flex-sm="100">
    <md-card class="md-cyan-theme">
      <md-toolbar class="md-cyan-theme" layout-padding>
        <div layout="column" layout-align="center" class="padding-20 text-center">
          <img ng-src="img/logo.png">
          <h1 layout="row" layout-align="center center" class="md-headline ng-scope" translate="">Registration</h1>
        </div>
      </md-toolbar>
      <md-content class="md-padding md-cyan-theme">
        <form name="registration">
          <basic-info user="registrationCtrl.user"></basic-info>
           <md-dialog-actions layout="column" layout-align="center">
            <md-button class="md-raised md-primary" layout="row" layout-align="center center" ng-disabled="registration.$invalid" ng-click="registrationCtrl.register()">
              Registration
            </md-button>
            <a
              class="md-primary md-button md-cyan-theme" ui-sref="login"
              aria-label="Already registered? Login now">Already registered? Login now</a>
             </md-dialog-actions>

        </form>
      </md-content>
    </md-card>
  </div>
</div>
</div>
We need to link somehow the registration form with the login form, so add a registration button to login.html as the following example shows:
<a
class="md-primary md-button md-cyan-theme" ui-sref="registration"
aria-label="Don't have an account? Create one now">Don't have an account? Create one now</a>
Profile
step_profile
Complete the profile.directive.js directive to load the current user:
var loggedinUser = AccountService.getLoggedInUser();
profileDialogCtrl.user = {};

angular.copy(loggedinUser,profileDialogCtrl.user);
We also want to save the profile details, so add the following function too:
profileDialogCtrl.save = function () {

UserService.update(profileDialogCtrl.user).$promise.then(
function(result){
angular.copy(result,loggedinUser);
},
function(error){
	console.log(error);
}
);
$mdDialog.hide();
};
Extend the template (profile.dialog.html) to load the basic form (between md-dialog-content tags):
<basic-info user="profileDialogCtrl.user"></basic-info>In the same template call the function that saves the profile when the user clicks the button:
ng-click="profileDialogCtrl.save()"Let’s upgrade our sidebar to a whole new level. To do this, inject AccountService in the leftnav.directive.js and retrieve the current user:
leftnavCtrl.user = AccountService.getLoggedInUser();Let’s create a button on the sidenav to reach user profile (leftnav.html):
<md-button profile-button class="md-accent" layout="row">
My Profile
</md-button>
We should also display the loggedin user, so paste the following code between the first md-content tags also in the leftnav.html template:
<avatar class="avatar" user="leftnavCtrl.user"></avatar>
<h3 class="fullname" layout="row" layout-align="center center" ng-bind="leftnavCtrl.user  | fullname"></h3>
 <small class="username" layout="row" layout-align="center center" ng-bind="'@'+leftnavCtrl.user.username"></small>
Let’s put the image of the user in the menu. To do this first inject AccountService in the menu.directive.js and query the loggedin user:
menuCtrl.user = AccountService.getLoggedInUser();Display the user avatar as a button (menu.html), that way the user can click on it and edit its profile:
    <md-button profile-button  aria-label="More"  ng-if="$root.loggedIn">
      <img ng-src="" style="     border-radius: 50%;
    margin-top: 10px;   height: 50px;
    background-color: white;"/>
</md-button>
Create room
There has been no word about rooms yet, so first let’s create the room model as room.model.js file in the room directory:
(function () {
'use strict';

angular
  .module('angularChat')
  .factory('Room', Room);

/** @ngInject */
function Room(apiUrl,$resource) {
  return $resource(apiUrl + '/rooms/:id');
}
})();
Don’t forget about the users of a room, so let’s create this model too (room.users.model.js):
(function () {
'use strict';

angular
  .module('angularChat')
  .factory('RoomUser', RoomUser);

/** @ngInject */
function RoomUser(apiUrl,$resource) {
  return $resource(apiUrl + '/rooms/:id/users/:userId', { id: '@_id' });
}
})();
Next we have to deal with the room service. Create room.service.js file with the following content:
(function () {
'use strict';

angular
  .module('angularChat')
  .service('RoomService', RoomService);

/** @ngInject */
function RoomService($resource, apiUrl,Room, RoomUser) {
    this.createRoom = createRoom;

  function createRoom(room){
    var newRoom = new Room({name : room.name});
    return newRoom.$save();
  }
  }
})();
The room creator button directive is in the create.room.fab.directive.js, but the event handler method is missing. Let’s implement this function:
createRoomCtrl.create = function(){
RoomService.createRoom(createRoomCtrl.newRoom).then(function(result){
  $rootScope.toast("Room "+result._id+" created successfully!");

  $mdDialog.hide();
},function(result){
  console.error(result);
  $rootScope.toast("We couldn't create your room, sorry :(")
});
}
We need to call this method in the create.room.fab.tmpl.html template:
ng-click="fabCtrl.createRoomDialog()"Add a tooltip too:
<md-tooltip md-direction="left">Create Room</md-tooltip>And finally compose the create room dialog template too (create.room.dialog.tmpl.html):
<md-dialog aria-label="New Room">
<form name="createRoomForm">
  <md-toolbar>
    <div class="md-toolbar-tools">
      <h2>Create Room</h2>
      <span flex></span>
      <md-button class="md-icon-button" ng-click="createRoomCtrl.cancel()">
        <md-icon md-svg-src="img/icons/ic_close_24px.svg" aria-label="Close dialog"></md-icon>
      </md-button>
    </div>
  </md-toolbar>
  <md-dialog-content>
     <md-content layout-padding>
      <div layout layout-sm="column">
        <md-input-container flex>
          <label>Room name</label>
          <input ng-enter="createRoomCtrl.create()" ng-model="createRoomCtrl.newRoom.name" required>
        </md-input-container>
      </div>
    </md-content>
  </md-dialog-content>
  <div class="md-actions" layout="column" layout-align="center">
    <md-button class="md-primary md-raised" layout="row" layout-align="center center" ng-click="createRoomCtrl.create()">
      Create
    </md-button>
 </md-dialog-actions>
</form>
</md-dialog>
List rooms
In this section we will create a panel that lists all available rooms. This panel will be activated from a button in the top menu. Let’s see how to implement all of this!
Add the following features to the RoomService:
- Get all rooms:
this.getRooms = getRooms;
function getRooms() {
    var rooms = Room.query();
    return rooms;
}- Get users of a room given with roomId :
this.getUsers = getUsers;

function getUsers(roomId) {
return RoomUser.query({id: roomId});
}
Now we create a button in the menu (menu/menu.html) that will open the room list on click:
<md-button room-list-opener  ng-if="$root.loggedIn">
Rooms
</md-button>
This is a plain old Angular Material button with a little bit of directive (room-list-opener) on top of it. Wait, we haven’t written this directive yet, so do it now (room/room.list.directive.js):
(function() {
'use strict';

angular
  .module('angularChat')
  .directive('roomListOpener', RoomListOpener);

/** @ngInject */
function RoomListOpener($mdBottomSheet) {
  var directive = {
    restrict: 'A',
    link: link
  };
  return directive;

  /** @ngInject */
  function RoomListController(RoomService,$rootScope,$state) {
    var roomListCtrl = this;

  }

  function link(scope, element, attrs) {

   }
}

})();
We need a click event handler in the directive’s link function:
element.on( "click", function($event) {

});
In the event handler let’s use Angular Material’ mdBottomSheet component:
$mdBottomSheet.show({
        templateUrl: 'app/room/room.list.tmpl.html',
        controller: RoomListController,
        controllerAs: 'roomListCtrl',
        bindToController: true,
        targetEvent: $event
      });
Here we can see the previously defined RoomListController listed as controller but it doesn’t do anything special yet. We want to display all rooms, so we need to query them from the RoomService
roomListCtrl.rooms = RoomService.getRooms();The template is missing though, so add a room.list.tmpl.html file with the following content:
<md-bottom-sheet class="md-list md-has-header">
  <md-subheader>Available Rooms
    <small>Click the room you want to open</small>
  </md-subheader>
  <md-content style="max-height: 200px;">
    <md-chips ng-model="roomListCtrl.rooms" readonly="true">
      <md-chip-template>
        <strong ng-click="roomListCtrl.openRoom($index,$chip)"></strong>
      </md-chip-template>
    </md-chips>
  </md-content>
</md-bottom-sheet>
Open room
In this section we will create a tab layout for the opened rooms.
First things first, add a getRoom function to the room.service.js file:
this.getRoom = getRoom;

function getRoom(roomId) {
var room = Room.get({id: roomId});
return room;
}
We also need a service that can keep tracks of opened rooms (opened.room.factory.js):
(function () {
'use strict';

angular
  .module('angularChat')
  .factory('openedRoomsFactory', openedRoomsFactory);

/** @ngInject */
function openedRoomsFactory(RoomService,$localStorage,$rootScope) {
  var self = this;

  var roomFactoryObj = {};

  return roomFactoryObj;
}

})();
Add the following functions to the opened.rooms.factory.js:
- Index of currently selected room:
  roomFactoryObj.setSelectedIndex = function(newIndex){
    $localStorage.index  = newIndex;
  };

  roomFactoryObj.getSelectedIndex = function(){
    return $localStorage.index;
};- Get room by index:
  roomFactoryObj.getRoomByIndex = function(index){
    var room = _.findWhere($localStorage.rooms, { 'index': index });
    return room;
};- Get all opened room:
 roomFactoryObj.getRooms = function(){
 return $localStorage.rooms;
};- Add room to opened rooms:
  roomFactoryObj.addRoom = function(room){
     if(typeof $localStorage.rooms == "undefined") {
            $localStorage.rooms = [];
          }

          room.index = $localStorage.rooms.length;
          $localStorage.rooms.push(room);
          $localStorage.index = room.index;
          $rootScope.$emit("room.added");
};- Remove room from the opened rooms:
roomFactoryObj.removeRoom = function(index){
    $localStorage.rooms.splice(index, 1);
         _.forEach($localStorage.rooms, function(room, i) {
           room.index = i;
         });
};- Is there any opened room?
roomFactoryObj.hasRoom = function(){
    return $localStorage.rooms && $localStorage.rooms.length>0;
};- Is the room opened?
 roomFactoryObj.containsRoom = function(room){
    var result = _.findWhere($localStorage.rooms, { '_id': room._id });
    return typeof result != "undefined";
};- Synchronize previously opened rooms from local storage when the factory is created:
function syncRoomsFromLocalStorage(){
    _.forEach($localStorage.rooms,function(storedRoom){
      $localStorage.rooms[storedRoom._id] = RoomService.getRoom(storedRoom._id)
    });
  }

  syncRoomsFromLocalStorage();
When you click a room in the list, it would be awesome to actually open the selected room. That means a new navigation aka state in the index.route.js file:
.state('rooms.room', {
        url: '/:id',
        templateUrl: 'app/room/room.item.html',
        controller: 'RoomItemController',
        controllerAs: 'roomItemCtrl',
        data: {authenticated: true},
        resolve: {
          users : function (allUsersFactory) {
            return allUsersFactory.initUsers();
          },
          room: function (RoomService, $stateParams) {
            var roomId = $stateParams.id;
            return RoomService.getRoom(roomId).$promise;
          },
          messages: function (MessageService, $state, $stateParams) {
            var roomId = $stateParams.id;
            return MessageService.getRoomMessages(roomId).$promise;
          }
        }
      })
As you can see we also need a RoomItemController for this state, so create room.item.controller.js file in the room directory with the following content:
(function () {
'use strict';

angular
  .module('angularChat')
  .controller("RoomItemController", RoomItemController);

/** @ngInject */
function RoomItemController($scope, users, room, messages, MessageService, RoomService, $log, $rootScope, $state, openedRoomsFactory, apiUrl, socketFactory, AccountService, Message, allUsersFactory) {
    var roomItemCtrl = this;
     roomItemCtrl.newMessage = "";
     var roomId = $state.params.id;
     roomItemCtrl.messages = messages;
     roomItemCtrl.users = [];
     roomItemCtrl.allusers = allUsersFactory.users;

   _.forEach(room.users, function (userId) {
        if (!isUserAlreadyAdded(userId)) {
          roomItemCtrl.users.push(allUsersFactory.users[userId]);
        }
      });

      roomItemCtrl.room = room;

  function isUserAlreadyAdded(userId){
    var userfound = _.findWhere(roomItemCtrl.users, {'_id': userId});
    return typeof userfound != "undefined";
  }
}
})();
Don’t forget to subscribe on your favourite socket.io events in the controller:
 socketFactory.emit("subscribe", {room: roomId, user: AccountService.getLoggedInUser()});

    socketFactory.on("user.joined", function (user) {
      if (!isUserAlreadyAdded(user._id)) {
        roomItemCtrl.users.push(user);
      }
    });

    socketFactory.on("user.left", function (user) {
      _.remove(roomItemCtrl.users, {
        _id: user._id
      });
    });

    $scope.$on("$destroy", function () {
      socketFactory.emit("unsubscribe", {room: roomId, user: AccountService.getLoggedInUser()});
    });
Next create the basic room view in room.item.html file:
<div layout="row" layout-wrap>
<md-content layout="column" flex="80" flex-sm="100">
  <md-content style="height: 60vh;">

</md-content>
  <md-content layout-padding layout="column">

  </md-content>
</md-content>
<md-content class="side-nav room-users" hide-sm layout="column" flex="18">
  <md-list layout-fill>
    <md-subheader class="md-accent">Available users</md-subheader>
   <md-list-item class="md-2-line contact-item selected" ng-repeat="(index, contact) in roomItemCtrl.users track by contact._id" ng-show="contact.username">
           <avatar user="contact"></avatar>
           <div class="md-list-item-text compact">
             <h3></h3>
             <p>@</p>
           </div>
           <md-divider></md-divider>
         </md-list-item>
  </md-list>
</md-content>
</div>
Declare the openedRoomsFactory dependency in room.list.directive.js file, and implement the function responsible for opening a room:
  roomListCtrl.openRoom = function(index,room){
if(!openedRoomsFactory.containsRoom(room)){
  openedRoomsFactory.addRoom(room);
  $state.go("rooms.room",{id: room._id},{reload: false});
}else{
  $rootScope.toast("You've already opened this room!");
}
};
Add an event handler to room.list.tmpl.html:
ng-click="roomListCtrl.openRoom($index,$chip)"For our tab layout we need to create the RoomsController too (room.tabs.controller.js):
room.tabs.controller.js:
(function () {
'use strict';

angular
  .module('angularChat')
  .controller('RoomsController', RoomsController);

/** @ngInject */
function RoomsController($scope, $timeout, $mdBottomSheet, toastr, RoomService, $log,$rootScope,$state,openedRoomsFactory) {
  var roomsCtrl = this;

   }
})();
In the controller we need to synchronize the opened rooms:
syncFromOpenedRoomsFactory();

$rootScope.$on("room.added", onRoomAdded);

    function onRoomAdded() {
      syncFromOpenedRoomsFactory();
      goToRoom(roomsCtrl.selectedIndex);
    }

    function syncFromOpenedRoomsFactory(){
      roomsCtrl.selectedIndex = openedRoomsFactory.getSelectedIndex();
      roomsCtrl.rooms = openedRoomsFactory.getRooms();
    }

    function goToRoom(newIndex) {
      if(openedRoomsFactory.hasRoom()){
        $state.go("rooms.room",{id: openedRoomsFactory.getRoomByIndex(newIndex)._id});
      }else{
        $state.go("rooms");
      }
    }
When you close a tab, you have to remove the room from the factory:
roomsCtrl.removeRoom = function (index) {
    openedRoomsFactory.removeRoom(index);
      goToRoom(openedRoomsFactory.getRooms().length-1);
  };
The current index and navigation state has to be updated too when you click on a new tab:
 $scope.$watch("roomsCtrl.selectedIndex",function(newIndex){
      openedRoomsFactory.setSelectedIndex(newIndex);
      goToRoom(newIndex);
    });
Next create the view for the tab layout (room.tabs.tmpl.html) with the following code:
<md-content flex ng-if="roomsCtrl.rooms.length > 0">
<md-subheader>Opened Rooms right now</md-subheader>
  <md-tabs md-dynamic-height md-selected="roomsCtrl.selectedIndex" md-border-bottom>
  <md-tab ng-repeat="room in roomsCtrl.rooms">
    <md-tab-label> <a ng-click="roomsCtrl.removeRoom($index,room)">
      <md-icon md-svg-icon="navigation:close"></md-icon>
    </a>
    </md-tab-label>
     <md-tab-body>
            <div ng-if="roomsCtrl.selectedIndex === $index" ui-view flex></div>
          </md-tab-body>
</md-tabs>
</md-content>
Don’t forget about unsubscribing the user when leaving the room! To achieve this, add the following changes to the logout method of the account.service.js file (add socketFactory and openedRoomsFactory dependencies too):
var openedRooms = openedRoomsFactory.getRooms();
//logout from rooms
_.forEach(openedRooms, function (room) {
socketFactory.emit("unsubscribe", {room: room._id, user: getLoggedInUser()});
});
Remove opened rooms too:
delete $localStorage.rooms;
delete $localStorage.index;
Routing needs to be extended in the index.routes.js file. There is a state called “rooms” already, add to this the following changes:
.state('rooms', {
  url: '/rooms',
  templateUrl: 'app/room/room.tabs.tmpl.html',
  controller: 'RoomsController',
  controllerAs: 'roomsCtrl',
  data: {authenticated: true}
});
Add openedRoomsFactory dependency to create.room.fab.directive.js and following changes too (here you make sure when opening a new room it will be listed in the opened rooms and actually opened too):
openedRoomsFactory.addRoom(result);
$state.go("rooms.room",{id: result._id});
Messages
First create a directory called “message” for the message aspect. Then add a message.model.js file in this directory with the following content:
(function () {
'use strict';

angular.module('angularChat')
.factory('Message', Message);

/** @ngInject */
function Message(apiUrl,$resource) {
  return $resource(apiUrl + '/rooms/:id/messages/:messageId',
{ id: '@_id' });
}

})();
Next create the service that is responsible for message handling (message.service.js):
(function() {
'use strict';

angular
  .module('angularChat')
  .service('MessageService',MessageService);

/** @ngInject */
function MessageService($resource,apiUrl,Message,Room,AccountService) {
}
})();
Add the following functions to the service:
- Get Messages in a room:
function getRoomMessages(roomId){
	return Message.query({id: roomId});
}- Create message in a room:
function createRoomMessage(roomId, message){
var newMessage = new Message();
newMessage.text = message;
newMessage.user = AccountService.getLoggedInUser();
newMessage.$save({id: roomId});
}
To make these two functions available from the outside add the following statements:
this.getRoomMessages = getRoomMessages;
this.createRoomMessage = createRoomMessage;
Add a function that handles message creation in room.item.controller.js:
roomItemCtrl.createMessage = function () {
MessageService.createRoomMessage(roomId, roomItemCtrl.newMessage);
roomItemCtrl.newMessage = "";
};
Add the missing socket handling:
socketFactory.on("new message",function (message) {
roomItemCtrl.messages.push(message);
});
Open room/room.item.html template! Here create an Angular Material list, that will display the roomItemCtrl.messages variable:
 <md-list scroll="roomItemCtrl.messages">
        <md-subheader class="md-info">Messages in room </md-subheader>
        <message ng-repeat="message in roomItemCtrl.messages track by message._id" message="message"
                 author="roomItemCtrl.allusers[message.authorId]"
                 ng-class="{ 'repeated-author' : $index>0 && message.authorId == roomItemCtrl.messages[$index-1].authorId}"></message>
      </md-list>
Create new message:
<md-input-container class="md-accent">
<label>New Message</label>
<input ng-enter="roomItemCtrl.createMessage()" ng-model="roomItemCtrl.newMessage" md-maxlength="350"/>
</md-input-container>
Previously we used message directive, but it doesn’t really exist. So create message.directive.js in the message folder:
(function() {
'use strict';

angular
  .module('angularChat')
  .directive('message', message);

/** @ngInject */
function message() {
  var directive = {
    restrict: 'E',
    templateUrl: 'app/message/message.item.tmpl.html',
    controller: MessageController,
    controllerAs: 'messageCtrl',
    bindToController: true,
    scope:{
      message: "=",
      author: "="
    }
  };

  return directive;

  /** @ngInject */
  function MessageController($mdDialog){
    var messageCtrl = this;
  }
}

})();
As last step create the template for that directive with the following content:
<md-list-item class="contact-item md-2-line selected" ng-if="messageCtrl.author">

  <avatar user="messageCtrl.author"  class="md-avatar message-avatar"></avatar>

  <div class="md-list-item-text compact">
    <p style="text-align: right;"><small><strong></strong>, </small></p>
     <div class="message-content">
          <ng-embed
            embed-data="messageCtrl.message.text" embed-options="$root.embedOptions"
          ></ng-embed>
        </div>
  </div>
</md-list-item>
Now you are ready, and hopefully you can use your brand new chat application.
If you stuck at some step, you can checkout the proper branch to this step from the Git repository.